
Friday, May 27, 2011
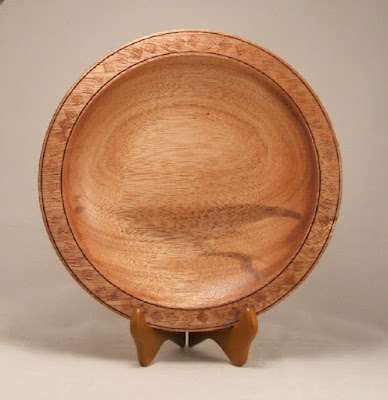
Black Walnut
Hand me a slab, let me chuck it up on the lathe, and it will sit there for a few days while I contemplate an ogee curve, or plan a pattern for a rim, or wonder if I should have cut it another way. Eventually there is a resignation, and a prodding to get on with it. Outer layers are always weather-worn, or sun bleached, and hiding what rests inside the wood. Chips fly in all directions and I'm kicking them out of my way on the floor so I can shift my stance to reach in under a tight curve. Work alternates between the lathe and the grinder, one with ribboned curls of wood arcing over my hands, the other with tiny sparks leaping up from the metal edge of the gouge as I guide it against the stone to freshen the cutting edge. Wood to metal, metal to wood. The two singing against each other as I reach the sweet spot, riding the bevel in a perfect, uninterrupted arc from top to bottom of the finished interior. And voila, it is done.


Thursday, May 19, 2011
The Ideal Bench Hook
My old bench hook is wearing out, and it's just about time to make a new one. As with any shop jig, when we're ready to re-make, it is often time to re-design. When I thought about it, though, I realized I've been using this particular bench hook in so many ways, for so many years, that it really doesn't warrant any re-designing. It is about as good as it's going to get, so I thought I'd share it with all you woodworkers and woodworker wanna-bees.
A basic bench hook is no more than a mini-shelf on top of the workbench, sporting a rear fence to press a workpiece against while you saw a cut line. One lip below, which holds it in place, and one lip at the back above, where you press the workpiece to hold it in place firmly while sawing.

This one is a bit more elaborate. It is not my own design, and I no longer have the magazine where some enterprising woodworker published it as a tip many years ago. If he's out there, I hope he'll step up and claim authorship of his design, because I've appreciated his innovative thinking for a long time.
Here is the basic bench hook, with storage for four dowel pegs on the left, and a drop-shelf to prevent cutting through the bench hook after doing 90% of the cut on a workpiece.

It is made with one 3/4" sheet of plywood 12" wide and 14" long. Another 1/4" sheet is glued on top of it, 10-1/2" wide x 14" long, and aligned with the left front corner (this is for right-handers, and can be reversed for lefties.) Then an equal length block 2x2" is glued under the bottom front, and an 8" 2x2" block glued on top at the back, aligned with the left side. Be certain the end cut of that back fence is 90º vertical to the flat bench hook, as it acts as a saw guide. Then add another smaller block to the right of the cut space, to steady the work when you move it over above the drop-off to finish the cut all the way through. Also, atop the back 2x2" fence, glue on two different grits of sandpaper to brush off any whiskers from your saw cuts, or to sand down the roughened end grain from a saw cut.
The final chore is to drill some random holes 1/2" deep in the bench hook that loosely fit your selected dowels, stored above in equally dimensioned holes when not needed. The dowels serve to steady oddly-shaped pieces for either sawing or drilling. When attaching lathe face plates for turning, for example, the drill produces a great deal of torque and the workpiece is nearly impossible to hold by hand with any stability. When secured in a front vise, this bench hook and dowel set up makes it a one-handed operation.


©BarbSiddiqui; use by permission only
A basic bench hook is no more than a mini-shelf on top of the workbench, sporting a rear fence to press a workpiece against while you saw a cut line. One lip below, which holds it in place, and one lip at the back above, where you press the workpiece to hold it in place firmly while sawing.

This one is a bit more elaborate. It is not my own design, and I no longer have the magazine where some enterprising woodworker published it as a tip many years ago. If he's out there, I hope he'll step up and claim authorship of his design, because I've appreciated his innovative thinking for a long time.
Here is the basic bench hook, with storage for four dowel pegs on the left, and a drop-shelf to prevent cutting through the bench hook after doing 90% of the cut on a workpiece.

The final chore is to drill some random holes 1/2" deep in the bench hook that loosely fit your selected dowels, stored above in equally dimensioned holes when not needed. The dowels serve to steady oddly-shaped pieces for either sawing or drilling. When attaching lathe face plates for turning, for example, the drill produces a great deal of torque and the workpiece is nearly impossible to hold by hand with any stability. When secured in a front vise, this bench hook and dowel set up makes it a one-handed operation.

So, knowing I cannot improve on this bench hook design, I'm ready to put together a new one. Truth is, I'm not going to throw away the old one, but save it for more 'scrappy' uses like chopping end cuts and various dent-worthy chisel pounding.
I hope this is of some use to others. For construction, here is one more photo of it on its side to clarify my directions. The dimensions are entirely up to you, so make it to fit your bench, or alter it as needed. I really wouldn't know how to get along without it!

Addendum: mine is only one kind of bench hook. Here is a YouTube link to another kind by famed handtool officionado Roy Underhill:
~BarbS
Monday, May 9, 2011
The "over-the-top" workshop
Surprise, surprise! Wood Magazine is publishing an article covering a new workshop built by Wenatchee's own Mike Walker, owner of Eagle Systems. I never knew he had dabbled in woodworking, but now he proves to the world he's gone far beyond 'dabbling.' His top-notch woodworking shop on the mountains above Lake Chelan will prove to be the envy of every woodworker who sees the article in Wood Magazine. Have a look at The Ultimate Wonderland of Woodworking he's created:
The "over-the-top" workshop
The "over-the-top" workshop
Wednesday, May 4, 2011
Barb Siddiqui (BarbSWoodworks) on Etsy
Working my way into the Etsy community has been fun. If any of you are thinking of 'setting up shop' and selling any of your own handcrafted items, I would recommend using Etsy.com for a launching pad. I've only been there a short time, and working on getting exposure, but I've become fully entrenched in their helpful articles and guidance to make my shop a success. I have confidence it is going to work, and work well.
Here is a Profile page with two 'Treasury' listings I've put together to honor other woodworking talent on Etsy.com. If you take time to visit, you'll find a wide range of project ideas and price values represented. In this day and age, artistic, handmade items are becoming more sought after and valuable. It's worth looking into!
Barb Siddiqui (BarbSWoodworks) on Etsy
Here is a Profile page with two 'Treasury' listings I've put together to honor other woodworking talent on Etsy.com. If you take time to visit, you'll find a wide range of project ideas and price values represented. In this day and age, artistic, handmade items are becoming more sought after and valuable. It's worth looking into!
Barb Siddiqui (BarbSWoodworks) on Etsy
Friday, April 29, 2011
The 'Running Crow' Bowl
Mahogany comes in many varieties and qualities. I was told mine is African Mahogany, and as with many woods, what lies on the inside of a board may be hidden from the outside. As I turned this piece to reach the depth I'd decided on, a dark stain began to appear and I was disappointed, thinking it may ruin the appearance of the wood grain. Deeper and deeper I turned the wood away, and lo and behold, a recognizable shape began to emerge.

The image of a crow running fast, stretched forward like a race horse, revealed itself and brought a big smile to my face. I guess it's true: Sometimes the greatest gifts are those unasked for!
See it at BarbS Woodworks
Thursday, April 14, 2011
From A Cupped Piece of Cherry
Selecting and cutting into a new piece of wood is always a crap-shoot. You pick up a piece of timber, go over it carefully for flaws like knots, cracks and defects barely visible, then you select a portion of it with prominent grain patterns or unusual color, and decide how to mount it on the lathe.
This time, I was holding a bit of a cupped piece of cherry about nine inches wide. It had a slight yellow tinge to it, with prominent cathedral grain through its center. I carefully placed my compass to establish the workpiece avoiding small pin-knots and a lengthy crack, drawing a circle all the way to both edges to get the full effect of the piece. Then to the bandsaw for prep work, and the workbench to plane a section flat and pre-drill for faceplate holes, then the lathe. The crusty surface texture came off to reveal a beautiful, fine-grained swirl of color, and voila! a shallow, curled-rimmed bowl was born, through four hours heavy labor:

This time, I was holding a bit of a cupped piece of cherry about nine inches wide. It had a slight yellow tinge to it, with prominent cathedral grain through its center. I carefully placed my compass to establish the workpiece avoiding small pin-knots and a lengthy crack, drawing a circle all the way to both edges to get the full effect of the piece. Then to the bandsaw for prep work, and the workbench to plane a section flat and pre-drill for faceplate holes, then the lathe. The crusty surface texture came off to reveal a beautiful, fine-grained swirl of color, and voila! a shallow, curled-rimmed bowl was born, through four hours heavy labor:

Cherry, 8-1/2" diameter, by 1" deep
Friday, April 8, 2011
Warmer Weather = More Production

A few items shown on the business websites. Now that the weather has improved dramatically, it is much easier to get into the work shop and work on new designs. I'm going to have to scrounge or purchase more large, dried stock, as the big pieces of mahogany I had are already reduced to nothing. One more smaller platter will finish it off, and 16" wide pieces are not easy to come by.
Most of our local fruit woods are from pruned trees, which produce shortened, knobby, angled limbs of 'reaction' wood, under tension more on one side than another. This makes for lots of wood movement and twisting in individual pieces when working the wood. I air-dry my stock, so its moisture content is always a bit higher than ideal to begin with, and dealing with wood movement is a constant. The rich grain patterns and wide variety in colors make it well worth the trouble!
Subscribe to:
Posts (Atom)